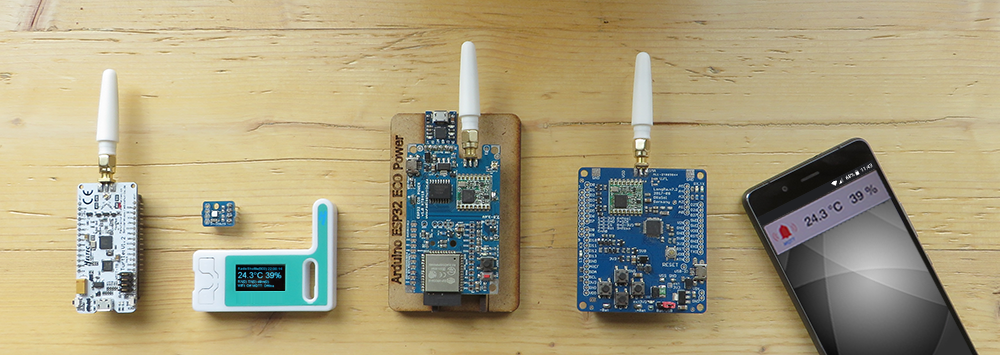
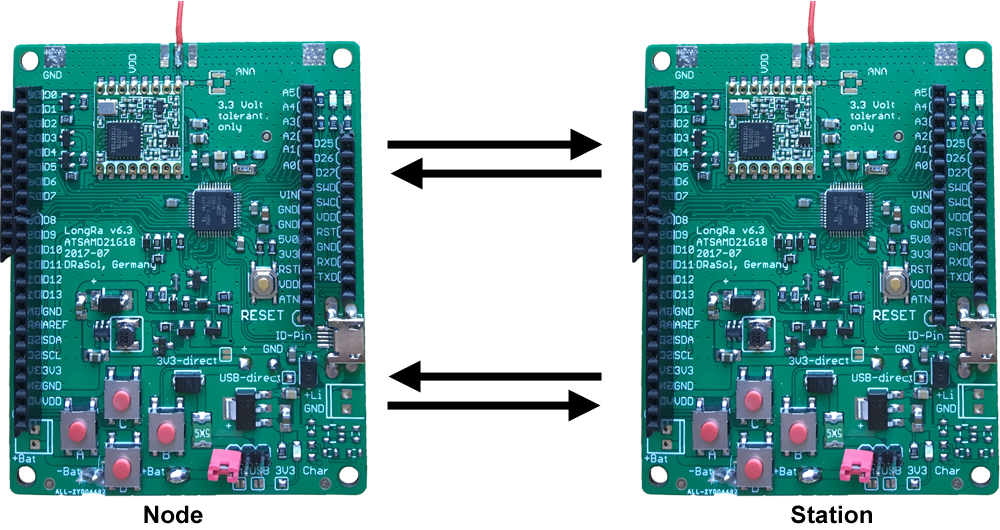
The simple RadioShuttle test application (“RadioTest”) is meant for beginners. There are two devices which communicate with each other and share a simple message. One device is called Node, the other is a so-called Station. At the touch of a button (button “A”) a message is transmitted from the node to the station. This also works the other way around, the station can also transmit a message to the node, assuming the node has been configured as Node Online (default is Node Offline).
RadioShuttle RadioTest example code
This example is included in the RadioShuttle product, here’s the simplified code:
/*
 * The file is Licensed under the Apache License, Version 2.0
 * (c) 2017 Helmut Tschemernjak
 * 30826 Garbsen (Hannover) Germany
 */

#include "PinMap.h"
#include <arduino-mbed.h>
#include <sx1276-mbed-hal.h>
#include <RadioShuttle.h>
#include <RadioStatus.h>
#include <RadioSecurity.h>
#include <arduino-util.h>
#include <RTCZero.h>
// #define RADIO_SERVER 1

#ifdef RADIO_SERVER
bool server = true;
#else
bool server = false;
#endif

enum SensorsIDs { // Must be unique world wide.
  myTempSensorApp = 0x0001,
#ifdef RADIO_SERVER
  myDeviceID = 1,
  myCode = 0x20EE91D6, // station board id and code
  remoteDeviceID = 9,
#else
  myDeviceID = 9,
  myCode = 0x20EE91DE, // node board id and code
  remoteDeviceID = 1,
#endif
};
In the section above it is determined, which app ID, and which device numbers are used by station and node.
/*
 * For details review: SX1276GenericLib/sx1276/sx1276.h
 * Supported spreading factors SF 7,8, 9, 10, 11, (12 does not work well)
 * Working frequencies using the 125000 bandwidth which leaves
 * sufficient distance to the neighbour channel
 * EU: 868.1, 868.3, 868.5 (Default LoRaWAN EU channels)
 * EU: 865.1, 865.3, 865.5, 865.7, 865.9 (additional channels)
 * EU: 866.1, 866.3, 866.5, 866.7, 866.9 (additional channels)
 * EU: 867.1, 867.3, 867.5, 867.7, 867.9 (additional channels)
 * Utilisation of these channels should not exceed 1% per hour per node
 * Bandwidth changes other than 125k requires different channels distances
 */
const RadioShuttle::RadioProfile myProfile[] = {
/*
 * Our default profile
 * frequency, bandwidth, TX power, spreading factor
 */
 { 868100000, 125000, 14, 7 },
 { 0, 0, 0, 0 },
};
Here, frequency, channel bandwidth, transmitting power, and the LoRa spreading factor are determined. These data must be identical amongst all participants, so please don’t change anything when running a first test!
DigitalOut led(LED);
InterruptIn intr(SW0);
volatile int pressedCount = 0;

void SwitchInput(void) {
 dprintf("SwitchInput");
 led = !led;
 pressedCount++;
}

Radio *radio; // the LoRa radio modem
RadioShuttle *rs; // the RadioShuttle protocol
RadioStatusInterface *statusIntf; // the status add-on
RadioSecurityInterface *securityIntf; // the security
Here, some global variables for the LED and button “A” get defined, in addition a function named “SwitchInput” that is called after the button has been pushed. InterruptIn and DigitalOut are Mbed compatible functions. Of course, Arduino functions can be used as well.
void setup() {
MYSERIAL.begin(230400);
InitSerial(&amp;amp;MYSERIAL, 3000); // wait 2000ms that the Serial Monitor opens, otherwise turn off USB.
SPI.begin();
rtc.begin();
dprintf("USBStatus: %s", SerialUSB_active == true ? "SerialUSB_active" : "SerialUSB_disbaled");
led = 1;
intr.mode(PullUp);
intr.fall(callback(&amp;SwitchInput));
dprintf("MyRadioShuttle");
RSCode err;
RadioStatusInterface *statusIntf = NULL;
RadioSecurityInterface *securityIntf = NULL;
// RFM95
radio = new SX1276Generic(NULL, RFM95_SX1276,
LORA_SPI_MOSI, LORA_SPI_MISO, LORA_SPI_SCLK, LORA_CS, LORA_RESET, LORA_DIO0, LORA_DIO1, LORA_DIO2, LORA_DIO3, LORA_DIO4, LORA_DIO5);
statusIntf = new MyRadioStatus();
securityIntf = new RadioSecurity();
rs = new RadioShuttle("MyRadioShuttle");
err = rs-&gt;AddLicense(myDeviceID, myCode);
if (err)
return;
rs->AddRadio(radio, MODEM_LORA, myProfile);
rs->AddRadioStatus(statusIntf);
rs->ampAddRadioSecurity(securityIntf);
rs->RegisterApplication(myTempSensorApp, &amp;amp;TempSensorRecvHandler)
if (server) {
err = rs->Startup(RadioShuttle::RS_Station_Basic);
dprintf("Startup as a Server: Station_Basic ID=%d", myDeviceID);
} else {
err = rs->Startup(RadioShuttle::RS_Node_Online);
dprintf("Startup as a Node: RS_Node_Online ID=%d", myDeviceID);
}
}
The initialization shown above activates the radio module (RFM95) and the related RadioShuttle protocol software with a status indicator “MyRadioStatus”, which makes the receiving and transmitting LEDs flash on activity. Node and server will then be started by the “Startup” function.
void loop() {
  static int cnt = 0;

  if (cnt != pressedCount) {
    int flags = RadioShuttle::MF_NeedsConfirm; // optional
    if (server) {
      static char msg[] = "The server feels very good today";
      rs->SendMsg(myTempSensorApp, msg, sizeof(msg), flags, remoteDeviceID);
    } else {
      static char msg[] = "Hello, the temperature is 26 celsius";
      rs->SendMsg(myTempSensorApp, msg, sizeof(msg), flags, remoteDeviceID);
    }
    cnt = pressedCount;
  }
  led = 0;
  sleep() // timer and radio interrupts will wakeup us
  led = 1;
  rs->RunShuttle(); // process all pending events
}
The main loop checks if the button has been pressed and sends a message to the counterpart station. The sleep function pauses the application until a new message comes in, i.e. the button has been pressed, or another activity interrupts the sleep. On activity, the LED is switched on, on high activity (e.g. an open USB “Serial Monitor” window) the LED flashes very quickly (which almost looks like permanent light). With disconnected USB plug and a restart (Reset) the LED should be switched off and merely flash upon activity.
The RadioShuttle example code includes a deepsleep() variant, which has USB deactivated and hence saves a substantial amount of energy.
void TempSensorRecvHandler(int AppID, RadioShuttle::devid_t stationID, int msgID, int status, void *buffer, int length)
{
  switch(status) {
  case RadioShuttle::MS_SentCompleted: // A SendMsg has been sent.
    dprintf("MSG_SentCompleted: id=%d %d bytes", msgID, length);
    break;
  case RadioShuttle::MS_SentCompletedConfirmed:// A SendMsg has been sent and confirmed
    dprintf("MSG_SentCompletedConfirmed: id=%d %d bytes", msgID, length);
    break;
  case RadioShuttle::MS_SentTimeout: // A timeout occurred, number of retires exceeded
    dprintf("MSG_SentTimeout ID: %d", msgID);
   break;
  case RadioShuttle::MS_RecvData: // a simple input message
    dprintf("MSG_RecvData ID: %d, len=%d", msgID, length);
    // dump("MSG_RecvData", buffer, length);
    break;
  case RadioShuttle::MS_RecvDataConfirmed: // received a confirmed message
    dprintf("MSG_RecvDataConfirmed ID: %d, len=%d", msgID, length);
    // dump("MSG_RecvDataConfirmed", buffer, length);
    break;
  case RadioShuttle::MS_NoStationFound:
    dprintf("MSG_NoStationFound");
    break;
  case RadioShuttle::MS_NoStationSupportsApp:
    dprintf("MSG_NoStationSupportsApp");
    break;
  case RadioShuttle::MS_AuthenicationRequired: // the password does not match.
    dprintf("MSG_AuthenicationRequired");
    break;
  case RadioShuttle::MS_StationConnected: // a confirmation that the connection was accepted
    dprintf("MSG_StationConnected");
    break;
  case RadioShuttle::MS_StationDisconnected: // a confirmation that the disconnect was accepted
    dprintf("MSG_StationDisconnected");
    break;
  default:
    break;
  }
}
The Receive Handler is called whenever a message has been sent, or a new message comes in, or an error has occured. Depending on the application, several Receive Handlers can be defined, one per app ID.
Message receipt
In general, a message transmission is confirmed, if the RadioShuttle::MF_NeedsConfirm flag is set in the SendMsg function. In this way, the node that sends the message is notified about the completed transmission only when the counterpart station has received the data. This prevents the message from being received only partly, or not at all.
Password authorization
A password can be stored for each RadioShuttle app ID. This prevents the station from accepting messages if the password between node and station is not identical. A password is stored for the original example code (please change to your own password).
bool usePassword = true; // password the can be used independently of AES
unsigned char samplePassword[] = { "RadioShuttleFly-PleaseChange" };
The password ensures that external devices cannot communicate with your devices. It is stored on a per-app ID basis, which allows using one app publicly while other apps may be password protected. Passwords do not have a protocol overhead because they only need to be checked upon initial contact between the node and the station. The Apps Strategy documentation contains additional background information related to different apps.
Passwords are not transmitted over the network, hence they cannot be stolen. Instead of a password a large random number, together with the password, is converted to a SHA 256-bit hash code. Only this hash code is transmitted, which changes upon each login, e.g. when restarting a device.
AES 128-bit message encryption
After a password has been stored, AES encryption can be activated.
bool useAES = true; // AES needs the usePassword option on
int flags = RadioShuttle::MF_Encrypted;
AES encrypts all app data by use of the password, so no participant on the network who logs the communication can see the message content. Also fake messages do not work with AES, and are dismissed.
For the RadioShuttle purposes AES128-bit is more than sufficient because 340282366920938463463374607431768211456 attempts (2128) are very time-consuming and not realistic. RadioShuttle password and AES encryption are included in the separate “RadioSecurityInterface” module and can be adjusted or changed for other requirements.
Despite all its benefits, AES encryption has one major disadvantage: AES128-bit has a minimum block length of 16 bytes per message that needs to be transmitted. With SF7 this takes approximately 100 milliseconds in addition, with SF11 it is as much as half a second.
AES encryption can be defined on a per-message basis. The RadioShuttle::MF_Encrypted flags in the “SendMsg” must be set to allow AES encryption of the message. The RadioTest example code already comes configured that way.
Logging of the RadioShuttle network packet
The RadioTest example activates the logging of network transactions and internal operations. This can be helpful to verify what is currently happening. Deactivating the “EnablePacketTrace” function disables logging.
Logging function by dprintf and dump
The “dprintf” function allows for a “C printf” compatible output, with a time stamp per output line as well as automatic appending of line end marks.
“dump” allows hexdumping data including the name, address and a length. Examples are included in the RadioTest application.
RadioShuttle API documentation
The “RadioShuttle.h” file contains the complete RadioShuttle protocol API documentation. In addition, the file “RadioShuttleProtocol.rtf” documents the underlying concepts of the RadioShuttle protocol.